Showing posts with label love cheap deals. Show all posts

Thursday, May 7, 2020

Farmhouse Mantels and Signs


Hey Y'all!
Hoping everyone out there is enjoying this beautiful day and sunshine that the Lord has blessed us with today.  I love the sunshine, it makes your skin feel warm and it so boosts my spirits! Today I just wanted to share about Mantels.  I love the fireplace.  Mine never looks the same very long.  
I love to change out the decor and have a different look, especially during the different seasons.  
I love love eucalyptus!  This wreath was so cheap and easy to make.  
Hobby Lobby will put its dried eucalyptus on one of their many sales and I purchased two bags and weaved it into this vine wreath I already had at home.  And the big plus is it smells soo good!  My Mema had
a bush here and she always kept it sitting out in rooms to make the house smell welcoming.  I plan to plant another one here this year because you really can use it for so many things.  
A lot of my decor comes from Hobby Lobby, but most of the wooden items you see were cooking things that my Mema used to make many meals for all us "heathens". So I have placed them up to remind me of her.  But the biggest shout out goes to the maker of my cute Agape sign.  If you need a custom sign I urge you to check out her mom's facebook page at Leah's Signs!
She does an amazing job AND I placed the order and had it in less than a week!  I love the word Agape. It means so much about the Amazing love that God has for us, which was in another blog post you can read about Here
I hope you have enjoyed this little post on mantels and please give Leah your support!


Thursday, November 10, 2016

Who doesn't like a good coffee cup?!! or pumpkin pie soap?


I LOVE LOVE a new cute coffee cup!  These are some that we have included in our gift baskets that you can do for Christmas.  The ones you have seen on the hooks in my kitchen that say Bless Your Heart, or other cute sayings are displayed here!
This is basket that I just completed for a friend for someone for there Birthday. The one below is 40.  It includes the soap dish and coffee cup.  Get yours ordered to be here in time for the holidays!


This holiday Christmas basket would be excellent for teachers for school, use the soap dish its 18, but if you would rather use the coffee cup it would be 20.  Would be glad to customize it the way you would like.  You could even do a small one with a towel, soap and candle for 15! 

This is one of our newest scents Pumpkin Pie!

Wednesday, November 9, 2016

Homemade, Holidays & Special Gifts

There are so many things that are thrown at us for the holidays.  Gifts, gatherings, and special events.  I always am one of those people who look and look for that one unique thing.  I want something special for people that says, "Hey, I really thought about you and something you may like!"  Don't get me wrong I still do gift cards and gift certificates sometimes, but its nothing like having a gift that really looks cute, or is something that's different.  So what I'm working on now are the gift baskets that we displayed back for the fall, but incorporating Christmas stuff.  We have different ways or things that you can put in them to allow them to fall in different price ranges.  The one I'm displaying today is 18$.  It contains a microfiber hand towel, wire basket, candle, soap dish and a bar of my Cranberry Fig Soap.(you can chose from any scent)  We already have a ton of these on order for people because they wanted them for teacher gifts. You could do one smaller say 15 (towel, soap and candle).  Which, I would love to get considering I do homeschool my kiddos.  So if you need one, send me a email!  We also do a range of dollar baskets, so you basically could customize a order with what all you would like in your basket.  Hope you like them!


Wednesday, May 11, 2016

NEW WAY OF DISTRESSING!

I have been distressing some furniture here lately, coffee tables, rockers, glider rockers and end tables.  For the most part, I have used the same process for all of them, sanding, painting with a flat paint, wiping it down and then sealing them with a linseed oil because I wanted it to have a sealer on them but didn't want it to be shiny cause I wanted it to have a farmhouse old use look.  Well I tried this on a glider rocker that I had painted and it went horribly wrong.  What happened, you ask?

Well I tried doing the same process but I wanted to use a glossy paint so this glider rocker would be a little different and all the furniture wouldn't look the same.


This was the chair before I started working on it.  It was just a typical glider rocker that I had from when the kids where born.  It had blue cushions.
I didn't take a picture of the mess I made, I guess I should have but I was frustrated and didn't think about it.  The process was, I sanded it so the paint would adhere to it.  I wiped it down with a soft cloth and then used 2 cans of glossy black paint from Lowes.  Their generic brand .99 each.  Once I did this I used a sheet of the bendable sand paper and distressed it.  It looked pretty good so I then decided to add the linseed oil.  Big Mistake! I'm guessing where the glossy has a sealer or shinny consistency it wouldn't let the oil soak into the wood.  It was sticky!!!  I mean like GUM! Yuck!
It reminds me of the trick where u put nasty stuff on a pair of binoculars and leave it for a person to give them raccoon eyes, buhahaha! Let someone sit in this chair and get up with stripes.. LOL
Anyways, I said well gotta go back to the drawing board.  So I bought a can of Acetone from Lowes. 
I took a old wash cloth and started wiping down the chair to get the gummy mess off.  The more I wiped the more I liked the way the wood was looking old.  So I wiped and wiped it. Once I took most of the sticky off I sanded over it a little and then resprayed in a few places where it took off to much.  I ended up really liking the way it looked in the end so I didn't go back with any flat paint.  I never thought about painting it and then using acetone to strip it down to give it a distressed look.  


I puchased painters slip covers from Walmart.  They are around 17 each and I have used them to cover 3 different chair projects.  So I spent around 15 bucks on this project.  

This is a couple of pictures of other projects that I distressed earlier, but I did it the other way that I mentioned at the top.  I used flat paint and used the linseed oil to seal them.  I liked the way they turned out also.  These are the supplies I used for most of the projects.


First before and after is a end table I have had for years. 
 Sanded and ready for paint


Sanded after paint


 Coat of flat black on top and then sanded to distress.


This is the finished product.  You can see the arm of the lazy boy chair that was teal blue, yes teal that I recovered with the painters slip cloth that come from Walmart that I mentioned above. 


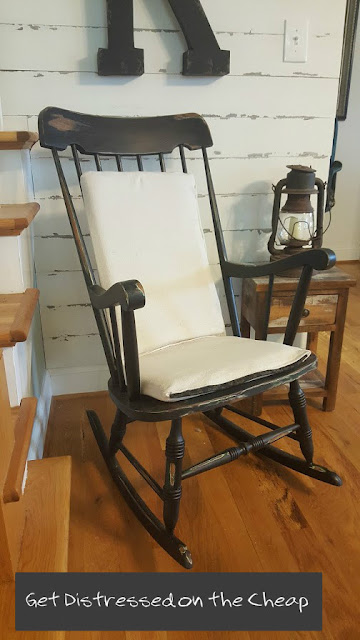
Another Project is my moms rocker that she rocked us in as baby's.  I wanted to incorporate that in my projects because it was Green... 
 This is when I started it. I had already sanded right much on it by the time I remembered to take a picture.  

I had painted it flat black and sanded it down, then painted it again.  


This chair had some old cushions, I also recovered those with slip cloth. This slip cloth has covered everything and it was only 17 Bucks!


Wednesday, April 20, 2016

DISTRESS ON THE CHEAP! 5 BUCKS FOR MY TABLE!

I have really enjoyed doing all these house projects because it helps put my brain in the place of happiness..... Yes my kids and hubby do that but sometimes you need this little me time inside yourself especially when you are home all day with 4 kids and homeschooling them... Can I get a Amen Madea?!    O yes, I get that someone may call the PO, PO over here if mama don't get a little quiet time in her head sometimes... LOL
  So anyway, I have taken to redoing the house into a more of a farmhouse style instead of rustic because for 1. it actually is a farmhouse and second because I just really like the style.  So good enough, I found a old coffee table that someone was going to through away.... AHHHH did you hear the angels sing... FREE love those 4 little letters! I had to do some wood working on it cause it was in pretty bad shape, but once I put my little touches to it I was very tickled at how it turned out.

This is the table when I first got it.  It was missing a drawer on one side, had these little shell looking things that I didn't like and it needed a good sanding.


So I just did a rough coat sanding, nothing major.
With a little hand sander.

Next I popped off the shells, they were attached with nails from a nail gun, this took like two seconds.  Then I sanded where they were so stains wouldn't show through.  I had left over Plywood from my shiplap wall... (I'm telling you, this stuff is awesome..if you are the least bit crafty you will use every inch of this stuff and not waste a bit!  I decided I wanted to cover the hole where the drawer was but wanted it to look like that on each side.  Now the plywood is sharpe on the edges and I wanted it to look soft like a real drawer, so I used the little dremel tool and sanded down the edges so it would look real... then I stained them grey and attached them with a nail gun.  
I did this on both sides.

I wanted the black distress to show through the top and since I was out of black spray flat I used some old black chalk board paint from my sons room, cause I didn't need much.  
Then I painted over that with gray paint from my bedroom. lol, I said it was cheap, and I already had all this stuff at the house.  

Once all the grey and white white was painted I used a soft sandpaper and distressed it in the areas that I liked... I also took a soft rag and coated with boiled linseed oil to give it a protective coat. 


 Next I went to Hobby Lobby and purchased some cute knobs that were 50 percent off which was 2.50 a piece to make them look like real drawers, used my husbands drill and made little holes for these.  I thought it was a cute final touch!


I was tickled with how it turned out.  My coffee table that was 5 bucks!!


Sunday, March 6, 2016

FARMHOUSE DECOR 20 BUCKS OR LESS!


Hello World....

I have gotten terrible about posting like I should.  I have like a million projects going on and I'm trying to get them done and make post.  Which would seem possible if I would do one project finish it and then post it.  But instead because my brain wants to do about a million projects at one time it takes FOREVER for me to complete something.  So this weekend I'm working on a coffee table remake, sanding down my moms original rocker that she rocked us in as kids, going to Ikea to get ideas, making slip covers for my chairs that don't match in my living room, ect, ect... the list goes on and on.  So I have managed to get a few of these things completed but yet to be able to do the write up with them.  

Today I finished my farmhouse wreath and was able to FINALLY complete my pallet wall in my bathroom.  I'm really tickled at how it turned out and I only spent around 20 bucks! Yay!
First I went to my famous go to Store Hobby Lobby!! I purchased a wreath that was more vine like and was already wound together. It was 19.99 and was 50 percent off, getting it for 10.  I also purchased the flowers that I like that was simple and kinda classy each were 4.99 also 50 percent off, so they were 2.50 each.  I bought 4 of these.  This is how they looked separate.
I had already started to add a couple of the flowers before I snapped the picture of the wreath. 
This is once I had them all fished in and was ready to hang... This is something so simple and easy to do, like 15 mins but gives the sweetest country look to any wall.